
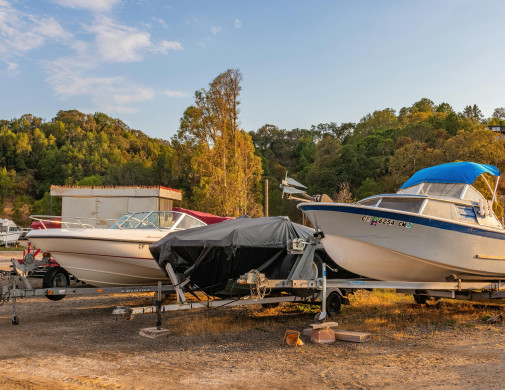
Why is winterization essential?
Winterizing is not just a maintenance formality, but active protection against winter damage. Sub-zero temperatures turn residual water into ice, causing cooling circuits and seals to burst. Unstabilized fuels oxidize and generate deposits that clog carburetors and injectors.
Accelerated corrosion during months of inactivity relentlessly attacks metal parts exposed to moisture and residual salt. Discharged batteries undergo irreversible sulfation, which drastically reduces their capacity. Lack of ventilation promotes mold growth in confined spaces.
Rigorous winter storage offers three major advantages:
- Mechanical preservation of all engine components.
- Financial savings by avoiding major repairs.
- Peace of mind throughout the winter period.
Your boat will be back to full efficiency as soon as the warm weather returns.
Preparing your outboard motor for winter
Start by flushing and stabilizing the fuel
Rinsing is the first essential step before winterizing any outboard motor. Run your motor for 20 to 30 minutes in clean fresh water using a suitable rinsing kit or a rinsing fitting attached to the water intake. This removes salt residues that accelerate internal corrosion.
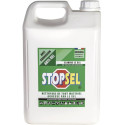
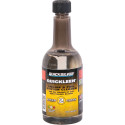
For engines that have been used in highly calcareous waters, apply an engine descaler or Stopsel cleaner according to the manufacturer's recommendations. These products dissolve mineral deposits that gradually clog the narrow passages of the cooling system.
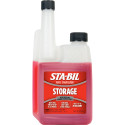
Fuel stabilization protects your fuel system from oxidation. Add a gasoline stabilizer directly to the tank according to the prescribed dosage, then run the engine for several minutes to distribute the product throughout the system. Then turn off the fuel supply and let the engine consume the fuel in the carburetor until it stops completely. This natural draining prevents the formation of gum and varnish during immobilization.
Carefully remove and clean the fuel filter. A clean filter ensures optimal starting in the spring without the risk of clogging the jets.
Drain the base and lubricate
The base shouldbe drained annually or every 200 hours of operation. Place a container under the lower drain plug, unscrew it, then remove the upper plug to completely drain the used oil. Milky-looking oil indicates water infiltration, requiring the intervention of a specialist to replace the defective seals.
Fill through the lower opening using a base oil pump until it overflows from the upper hole, thus eliminating any air bubbles. This technique ensures optimal filling without gas pockets that would compromise lubrication.
Remove the propeller to thoroughly inspect the shaft and shear pin. Clean marine deposits with an engine cleaner, remove all traces of corrosion, then generously apply a saltwater-resistant marine grease to the shaft before reassembly. Check for deformed or cracked blades, which degrade performance and place abnormal stress on the transmission.
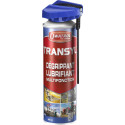
Lubricating all the pivot points with a penetrating lubricant will keep the controls working smoothly. Operate each mechanism several times after application to distribute the protective product evenly.
Inspect critical components
The spark plugs reveal the state of the engine's carburetion. Unscrew them to examine the electrodes: a black, sooty color indicates a mixture that is too rich, while a white color indicates a mixture that is too lean, which is dangerous for the engine.
Spray winterizing oil into each cylinder through the spark plug hole, then manually operate the starter to distribute the protective film on the internal walls.
Measure the electrode gap, which should be between 0.7 and 0.9 millimeters. Clean off any deposits with a fine wire brush and replace any spark plugs with eroded electrodes.
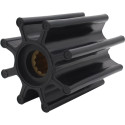
The water pump impeller must be replaced every year or every 200 hours. This rubber part is subject to natural wear and tear, which gradually reduces the cooling flow. Always keep a spare impeller on board to deal with any failures while sailing.
Inspect the sacrificial anodes located on the base and under the cavitation fin. These parts protect the vital parts of the engine by consuming themselves in their place. Replace them as soon as they have lost more than a third of their initial volume. An anode that is too corroded no longer fulfills its protective role.

Winterizing an inboard engine
Drain the engine and replace the filters
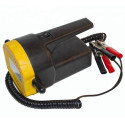
Drain the engine oil while the engine is warm to facilitate complete drainage. Use an electric drain pump to suck the oil out through the dipstick tube or unscrew the sump plug, depending on accessibility. Used oil contains aggressive acids and metal particles that attack surfaces during storage.
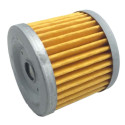
At the same time, replace the oil filter, lightly greasing the seal of the new filter with clean oil. Tighten by hand without excessive force. Fill the sump with the engine oil recommended by the manufacturer, according to the viscosity suitable for your climate.
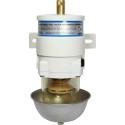
The fuel decanter needs to be drained of accumulated water by unscrewing the drain screw until pure diesel fuel flows out. Change the filter cartridge and purge the system according to the specific procedure for diesel engines to remove any air bubbles. A fuel treatment added to the tank prevents bacterial growth and protects against oxidation.
Protect your cooling system
The cooling system requires special attention to prevent breakage due to freezing. First, check the antifreeze level in the primary circuit and top up if necessary with a product rated for at least -25°C. Run the engine for a few minutes to mix the fluid throughout the system.
For the seawater circuit, rinse thoroughly with fresh water by connecting a hose to the seawater inlet with the engine idling. Continue until the exhaust water is completely clear. Then introduce antifreeze into the circuit by pouring it directly into the seawater filter or by having it sucked in by the pump via a hose immersed in a container. Leave the engine running until colored liquid comes out of the exhaust.
Remove the seawater pump impeller for inspection. Keep it dry during the winter and install a new gasket when reassembling in the spring. Carefully clean the filter strainer and check the condition of the hoses and clamps.
Lubricate and check the belts
Grease all lubrication points indicated by the manufacturer with a suitable marine grease. Bearings, joints, and mechanisms require this protection against ambient humidity.
Inspect accessory belts for cracks, fraying, or signs of excessive wear. A properly tensioned belt should flex approximately 10 millimeters under moderate finger pressure in the middle. Replace any questionable belts before returning to service.
Check the transmission bellows on Z-drive bases. Any cracks or porosity may allow water to penetrate and seriously damage the internal mechanisms. If in doubt, replace immediately.
Protect circuits and equipment
Drain water circuits
Freshwater circuits are a critical area when it comes to freezing. Open all drain valves located on tanks, water heaters, and pumps. Turn each valve until it is completely drained. For added security, remove the pumps and store them in a frost-free location.
Add a non-toxic antifreeze product specifically designed for drinking water circuits to the system by pumping it in from a container. Keep the taps open until the colored liquid appears, ensuring that all pipes are protected. Then leave all taps and valves in the open position.
Marine toilets require the black water tank to be completely drained into a suitable facility. Clean with a degreasing product, then introduce antifreeze by pumping until it appears in the bowl.
Store your batteries in a dry place
If possible,remove your batteries and store them in a dry, temperate room. Thoroughly clean the terminals with a wire brush to remove any traces of sulfation. Connect them to a smart charger that automatically maintains the optimal charge.
If removal is not possible, fully charge the batteries and then disconnect them from the consumer circuits. Check their charge status monthly and recharge if necessary. A lead battery that is more than 70% discharged will suffer irreversible damage. Caution: keep the bilge pump powered to maintain its safety function.
Dehumidify and ventilate your boat
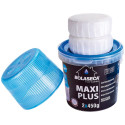
Moisture is the main enemy during winter storage. Install several moisture absorbers in different areas of the boat, focusing on confined spaces and areas near electronic equipment. Refillable absorber kits offer an economical solution for long periods.
Check that fans and natural vents are working properly. Keep all lockers, cupboards, and drawers open to promote air circulation. Remove cushions and upholstery or position them vertically to speed up drying. An electric dehumidifier is invaluable on boats with a permanent power supply.
Clean and protect the hull
Clean your entire boat with a suitable hull and deck cleaner and eco-friendly products. This will remove dirt that traps moisture and accelerates deterioration. Pay particular attention to the deck, console, halyards, and all accessible corners.
For the interior, use a multi-surface cleaner, methodically treating each area. Leave the refrigerator open and unplugged after cleaning to prevent mold.
Anti-corrosion: your best ally
Critical areas to protect
Corrosion is a constant threat to nautical equipment exposed to salt water and moisture.
Several areas require systematic protection:
- Metal parts of the engine
- Chrome parts
- Steering components and mechanical joints
- Electrical contacts, switches, and fuses
- Aluminum and stainless steel components
Corrosion of electrical components causes random malfunctions that are difficult to diagnose, while metals suffer electrochemical attack in saline environments.
Suitable anti-corrosion products
- Winterizing oils create a durable protective film on all metal surfaces. Their specific formulation resists moisture during several months of immobilization. Choose these products for internal treatments of cylinders and complex mechanisms.
- Lubricating rust removers have a dual function: they dissolve existing oxides while protecting against the formation of new rust. Their penetrating power allows them to effectively treat screw assemblies and mechanisms that are difficult to access.
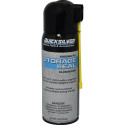
- Anti-corrosion sprays can be quickly applied to large surfaces and create a water-repellent barrier. Using them on external engine parts, control cables, and bridge components ensures complete protection.
Application techniques
Start by thoroughly cleaning all surfaces to be treated with a degreasing engine cleaner. Dry completely before applying protective products. A damp or greasy surface will compromise the adhesion of the anti-corrosion film.
Spray the chosen product generously over the entire engine with the cover removed. Pay particular attention to areas that are usually exposed to spray: electrical log in, alternator, starter motor, exhaust manifold. Also treat control cables, steering joints, and all moving parts.
For internal parts, spray winterizing oil into the cylinders and then manually operate the mechanism to distribute the product. Lubricate the propeller shaft and splines generously with saltwater-resistant grease. Don't forget the trim cylinders, which are directly exposed to immersion.
Summary: key points to remember
Winterization is an essential annual maintenance procedure that preserves the value and reliability of your boat. This methodical preparation protects against freezing, corrosion, and costly breakdowns, while making it easier to get your boat back into service in the spring.
Thoroughly flushing the cooling system with an engine descaler removes salt and lime deposits. Stabilizing the fuel and completely draining the carburetor prevents oxidation and gum formation during storage. Draining the base and lubricating the propeller ensures that the transmission components are protected.
Systematic inspection of critical components identifies wear parts that need to be replaced: water pump turbine, sacrificial anodes, spark plugs, and belts. Preventive replacement avoids failures at the start of the season.
Corrosion protection is the most cost-effective investment for preserving mechanical integrity. Applying winterizing oil to the cylinders, lubricating penetrating oil to the mechanisms, and protective spray to the external surfaces creates a durable barrier against oxidation.
Completely draining the water circuits and adding antifreeze prevents frost damage. Storing charged batteries in a temperate room significantly extends their life. Installing moisture absorbers and maintaining effective ventilation prevents mold and condensation.
Rigorous winterization ensures that your boat will be ready to sail as soon as the weather improves, without any unpleasant surprises or emergency repairs. This annual routine is your guarantee of a successful season.


FAQ - Boat winterization
When should winterization begin?
Winterization ideally begins in September-October, as soon as the boating season ends. This period offers favorable weather conditions for outdoor work and allows you to work comfortably before the frost sets in.
Can you winterize your engine yourself?
Yes, with basic technical knowledge and by methodically following the recommended steps. During the warranty period, have the work done by an authorized dealer. Once the warranty has expired, you can winterize the engine yourself, following the manufacturer's recommendations.
Should the fuel tank be completely emptied?
No, keep the tank full after adding a gasoline stabilizer to limit condensation. Only empty the carburetor on outboard motors by cutting off the fuel supply and letting the engine run until it stops. Gasoline should never be left untreated for more than two months.
How should batteries be stored?
If possible, remove them and store them fully charged in a dry, frost-free place. Connect them to a smart charger or recharge them twice during the winter at three-month intervals. A battery that is more than 70% discharged will suffer irreversible damage.
How often should the turbine be replaced?
Replace the water pump turbine annually or every 200 hours of operation, even if it appears to be in good condition. This rubber part ages naturally and its failure causes the engine to overheat. Always keep a spare turbine on board.